First . . . I laid out some pieces of mulberry paper to see which colors might look well together . . .
Showing posts with label Mulberry. Show all posts
Tuesday, February 3, 2009
Mulberry Paper Collage Technique
This is an oldie but goodie technique using Mulberry Paper collage backgrounds . . . it can be used to make surreal landscape images . . . or not!!! LOL!!!! I purchase mulberry paper from craft stores . . . Asian stores . . . and stamp conventions . . .
First . . . I laid out some pieces of mulberry paper to see which colors might look well together . . .
After that decision . . . I traced a path with my aqua-brush (using a brush with water works just as well) . . .
That makes it easier to tear the delicate mulberry paper . . .
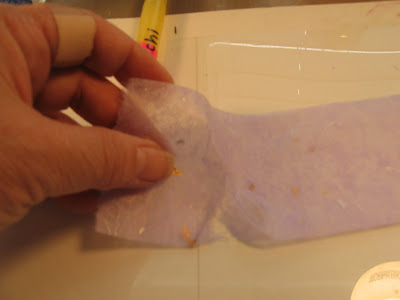
I continue the procedure to all my colors until I'm done . . .
First . . . I laid out some pieces of mulberry paper to see which colors might look well together . . .
I brush Elmer's glue (or PVA glue) onto the first piece with a sponge brush . . .

Here you see me "pushing" more fibers outward from the paper to create a "stringy" effect . . .
After all the layers are added to the cardstock . . . I sponged on Scribbles Glittering Crystal . . . it's a fabric paint from the craft store . . . let dry . . .
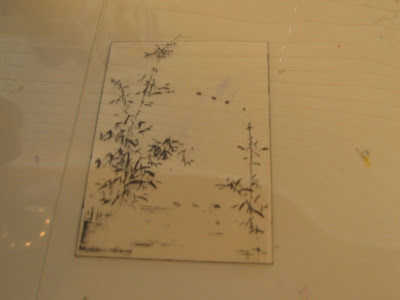
Before I stamp my clear acetate . . . I make a "template" by outlining the same size cardstock so that I can see where I'm stamping onto the clear acetate . . .
I carefully lay the mulberry paper down on the bottom of the cardstock . . . I like to "push" the fibers outward from the paper for more texture . . .
I like to use Black Staz On ink to stamp images (this one is a Kodomo Inc. set Bamboo Lake 6868-001) on my clear acetate . . . I purchase ordinary transparencies that you write on from the office supply stores . . . they're less expensive than the heat-sensitive kind . . . I have yet to find an ink that can stamp a "perfect" image on the shiny surface, and I DO have to go back and fill in "holes" with a black Sharpie marker, at times . . . but I find that this product does the best job for my purposes . . .Careful . . . the inked stamp slips easily on the shiny surface . . . press gently and lift straight up . . .
Now . . . you probably never make a mistake like I do . . . but when I do with the Staz On ink on clear acetate . . . it's easy to fix with a spritz of ordinary rubbing alcohol and a paper towel . . . I even use rubbing alcohol to clean my sticky fingers . .
When I am happy with my image . . . I am ready to adhere it to my mulberry paper collage background.
My Xyron machine works nicely to put sticky stuff on the back of my clear acetate image . . . I understand that JudiKins Diamond Glaze and Ranger Glossy Accents work, as well . . .
I hope you liked this technique . . . Have fun!!!!!
Subscribe to:
Posts (Atom)